
Springs Page 2
Updated April 19, 2016
Excerpts from the 1998 Hummer Shop Manual
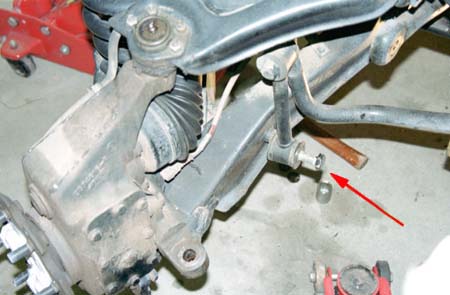
2. Unbolt the bar link from the lower control arm.
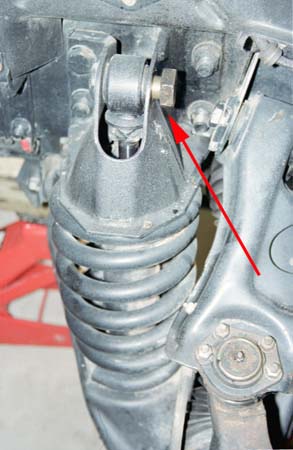
4. Jack up the lower control arm to relieve the tension and remove the shock pin/bolt.
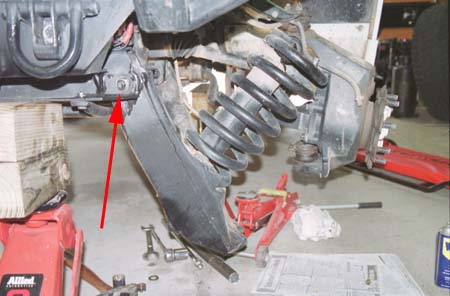
6. Loosen the bolts that hold the lower control arm to the frame, otherwise the A arm will not drop down far enough to get the spring out. Remove the jack. Pull the geared hub out and the lower arm will drop down allowing the spring to be pulled out from above.
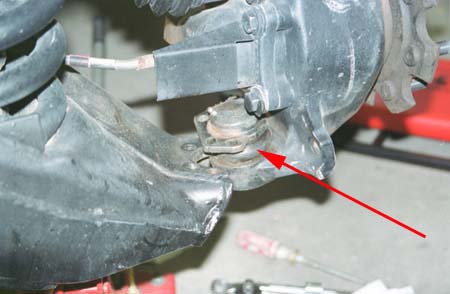
3. Put a small floor jack under the lower control arm and remove the 4 bolts holding the lower ball joint to the lower control arm.
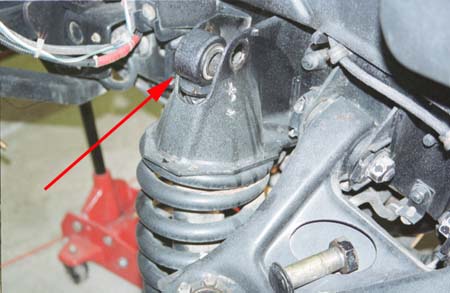
5. Push the top of the shock absorber down as far as it will go which is about 4".
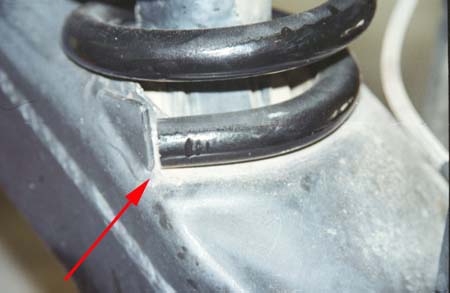
7. Install the new spring over the shock onto the lower control arm. Make sure that the gap at the end of the spring is between 1/16" to 1/8" away from the stop in the spring seat. Push the spring foreword and align it with the upper seat.
NOTE: If you had previously measured the spring gap and it has increased beyond a 1/2 inch you may want to seriously consider removing the springs and checking the lower A-arm for cracks. Look at the A arm article.
Jack up the lower control arm and pull the shock rod up as far as it will go. Make sure that you still have a gap between the lower spring and it's seat. I had to play with this a few times to get it right because as the spring compresses it rotates.
Line up the shock rod with the tower and reinstall the shock pin. Tighten to 300 ft/lbs. Install the lower ball joint and geared hub on the lower control arm ensuring that the ball joint is below the lower control arm. Tighten the front locknuts to 37 ft/ lbs and the rear's to 60.
I thought it was all down hill from here except I couldn't get the bolts back in the lower control arms for all the tea in China. They just wouldn't line up. After screwing around for over an hour I ended up having to drop the whole stabilizer bar down by loosening up the mounting bolts on either side of the truck. This gave me the free- play I needed to bolt the bar links (70 ft/ lbs. with thread locker) to the control arm. Then I torqued the stabilizer bar mounting bolts to the required 60 ft./lbs.
Do NOT re-tighten the lower control arms until the very last thing after the weight is
back down on the suspension and a few jounces/rebounds have been done. This
should help reduce the possibility of throwing wheel alignments off slightly.
Another condition that may effect wheel alignment slightly on H1's with
older style lower control arms, is the free play that exists when using original
3/8" bolts with newer ball joints designed for larger 7/16" bolts.
Re install the tie rods. Go to the tie rod Article
My truck is now running smooth with no shake. The winch springs brought the height to 18 inches. The truck rides noticeably stiffer then before. After doing this, check the aiming of your headlights. With the front raised up they may be aimed too high.
