
Replace Tie Rod Ends
Updated March 6, 2010
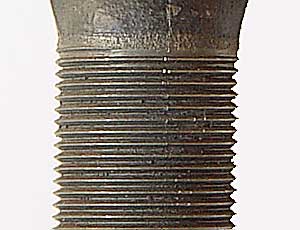
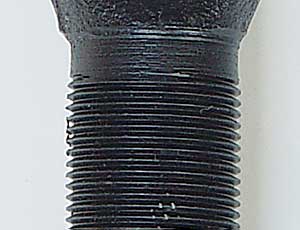
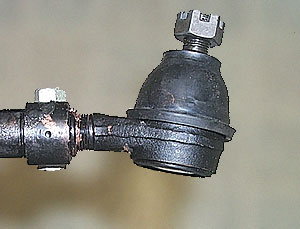
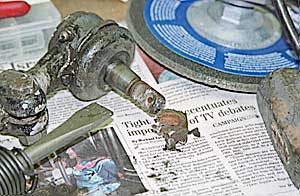
Here's what brand new tie rod ends looks like. The front upper and lower tie rod ends are threaded differently. One has left hand threads, the other right. The tie rod end part 6011887 is a Right Hand thread. 6011886 is a left hand thread. The center section is called the sleeve. The tie rods have a 7/8-18 bolt/pitch with a 5/8" center eye.
The tie rod shown is a newer design with an offset. These came out because the older straight joints bound up under extreme suspension flex. AMG calls the new design 'Zero Toe'. You can freely mix and match these without a problem.
The new tie rod ends are slightly longer than the straight ones. When you buy a new complete tie rod assembly you get a shorter adjusting sleeve or center section. The new ends worked fine on my 98 wagon. The latest sleeves have a groove at each end to hold the clamps in the proper position.
The left hand thread tie rod was originally installed on the outer end with the right hand on the inner side. As long as you have one left hand thread and one right hand thread per assembly it doesn't really matter how they go on so verify the part when ordering a replacement.
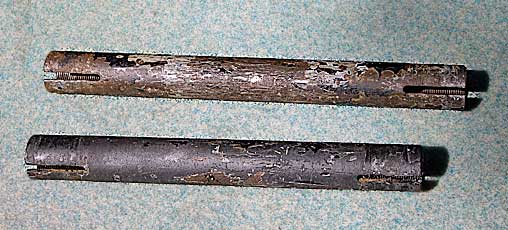
Both rear radius rods have left hand tie rod ends on the outside. The other side of the adjusting sleeve is screwed into a bushing that's bolted to the truck. The rear tie rod ends are the same part as the front left handed threaded part. The rear adjusting sleeves (about 11") are longer then the front sleeves (about 9.5").
Front Tie Rods
Removing the front tie rods is straight foreword. You really don't have to jack up the truck and take off the wheels.
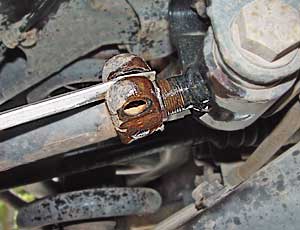
Take out the cotter pins, unscrew the nuts and either knock the rod ends out with a hammer, use a pickle fork or a puller. The nuts can be really tight because many mechanics use a big impact wrench instead of a torque wrench to tighten. I had to use a breaker bar with a piece of pipe to get 2 of the nuts loose. On one side the cotter pin was impossible to get at. I had to jack up the truck, put a jack stand underneith for safety and remove the wheel.

Of course, nothing is that easy because one of the nuts was on so tight that it was spinning the stud in the tie rod. There was no way to keep it from turning so I had to grind and air chisel the nut off the stud. Not a fun job.
I marked the end of the tie rod that attaches to the hub with a nylon wire tie. While this isn't necessary, it will ensure that the toe adjustment direction remains the same when I reinstall the tie rod.
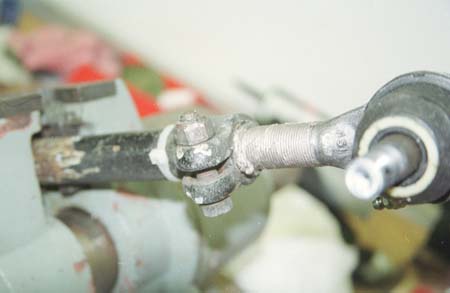
Next loosen the tie rod clamping bolts. Make note of the direction each clamping bolt faces. They must be reinstalled facing the correct direction. Un-screw each end making sure that you count the turns exactly. If possible to the quarter turn. Write down the count for each end. This will be the only way you can preserve your front toe-in adjustment.
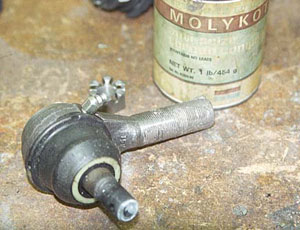
A major problem on all the Hummers is seized up tie rod threads. Evidently during manufacture, the trucks are dipped in a cleaner. This cleaner causes the tie rod threads to corrode. On my first truck (a 95 wagon) we had to take the tie rods off the truck, put them in a vise, torch them and use a big pipe wrench to unscrew the ends. So, if you want to have an easy time adjusting the toe on your truck you should apply lots of anti-seize to the threads of all the tie rod ends.
Carefully screw the tie rod ends into the radius rod counting the exact turns that you noted above. Tighten the clamp to 30 ft./lbs. making sure it faces in the correct direction.
Note: As much as I've tried, the alignment never really comes out right. If you are replacing any old style tie rod ends with the new style the thread count won't matter because of the change in length. At least you can get the truck close enough so you can drive it to the alignment shop.

Re-install the tie rod to the center link and geared hub. Tighten the slotted nut to 70 ft/lbs. and insert a new cotter pin. (VERY IMPORTANT) Make sure that the outboard clamp (the one by the wheel) faces the half-shaft and the inboard clamp faces away from the stabilizer bar.
Rear Radius Rods
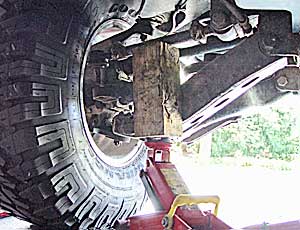
On the rear I left the wheels on and didn't jack up the truck. I figured if I remove the tie rod and replace it by adjusting it's length so it fits right into the hole in the hub cover it should be fairly aligned. In retrospect, this is not true so don't waste your time. Like above, it will get you close enough to drive the truck to the alignment shop. It's easier to remove the rod if the wheel is off the truck.
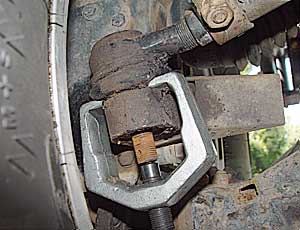
Spray some liquid wrench or PB Blaster on all the nuts that you plan to remove. Jack up the truck under the A arm and take off the wheel. It will give you a lot more room to work. Remove the cotter pin and lower nut (1-1/16). I used my pitman arm tool to pop the tie rod out of the hole in the geared hub cover. Loosen the lower clamp on the sleeve with a 5/8 and a 11/16 socket wrench. Try to unscrew the tie rod end from the sleeve using a pipe wrench. Mine would not unscrew. I think if I had the truck up on a lift with better leverage I could have, but not laying down on my back. At this point I decided that it would be easier to take the upper bushing off. I put a 1-1/8 socket on a breaker bar but I just couldn't get any leverage laying down. That bushing bolt is on really tight.
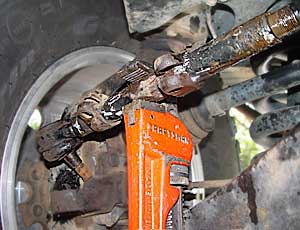
Now to plan B. I used a pipe wrench and unscrewed the whole sleeve from the top bushing. This was a pain because the tie rod end wasn't just spinning freely because the rubber bushing wants to push the rod down against the geared hub. Once the assembly was out I unscrewed the tie rod end from the sleeve with a big pipe wrench and a vise.

I cleaned up the sleeve, put antisieze on the inside threads and started the tie rod end. Make sure you put the two clamps down over the sleeve. Don't forget, tell me why I know. Then put antisieze on the bushing threads and screw the sleeve onto the bushing while holding the tie rod end stable so it screws into the sleeve at the same time. Once the tie rod end gets drawn toward the steering arm cover I used a small jack to raise the tie rod end up so I could continue screwing it until the bolt dropped into the hole. Tighten the bolt to 70 ft lbs install a new cotter pin and tighten the 2 clamps.
At this point you should perform a 4 wheel alignment. Theoretically reassembling the tie rods with the exact turns should get you back to the same alignment you had before the repair. This assumes that your truck was in perfect alignment before the repair which it probably wasn't because there were worn front end parts. If the toe is off it only takes a couple thousand miles to ruin a 300 dollar tire.
