
Transfer Case & Transmission Temp Gauge Install
Updated February 7, 2008
Wiring Harness
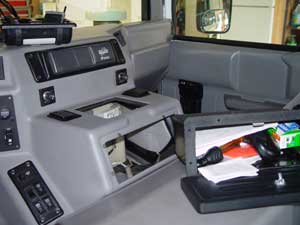 Remove the Glove box and lift out the cup holder tray. This way you can get a lot of space to work without taking the doghouse out. I was able to fit a drill in too make the wire feed hole.
 You may be able to get your wire into the large access hole for the Aux A/C hoses if there's room. I already used up the available space with a large power wire that feeds my amateur radio.
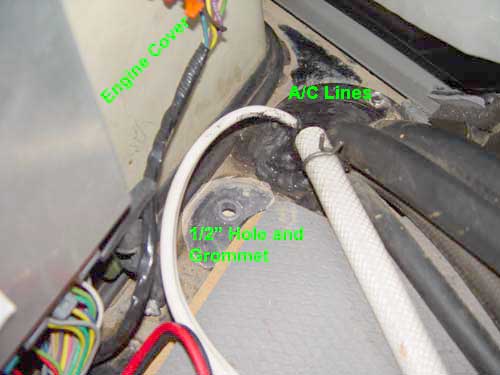
Otherwise Drill a 1/2" dia hole in the floor next to the large access hole watching out that you don't drill through something important below. Insert the grommet in the hole.
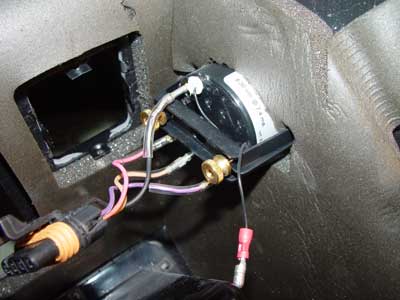 This is what it looks like from the rear all wired up.
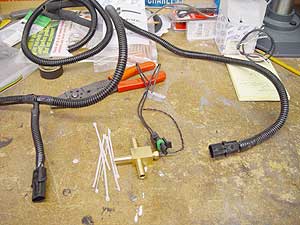 Each sensor needs a ground and a hot. I installed the female weatherproof connectors on 2 pairs of wires. Write down the color of the wires you are using for each sensor. I routed one set to the transfercase and another to the transmission to get the lengths of each leg. I then wire tied pairs and stuffed them into a couple of lengths of that black split flexible tubing. I plugged in the sensors and wiretied the harness to the truck. I then fished the 4 wires up through the hole in the floor into the doghouse. There is a black electrical putty that seals the hole with the A/C lines. Take a little of it and mold it around your grommet and hole to make it water tight.
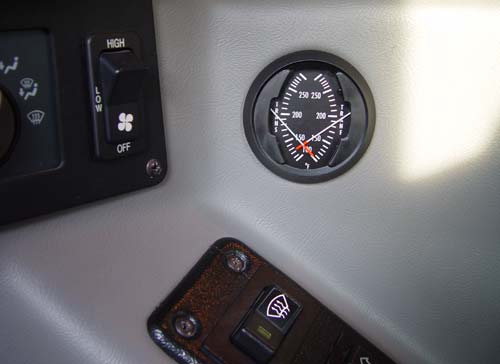
Drill a 2" hole with a hole saw in the side of the doghouse under the ashtray. Make sure that you are far enough down so the back of the meter will clear the inside of the ashtray.
The meter needs a good ground, 12 volts switched when the truck is on, and a wire from the other gauges supplying power to it's dash light. I picked up a ground from one of the cigarette lighters, I got switched 12 volts from the power window switch and the dash light power from the back of the tach cluster.
I picked up a multi conductor plug and wired it between the gauge and all the feeds. Make sure that you put disconnects (bullet or spade connectors) on all the wires so you will be able to remove the doghouse without cutting any wiring. Your Hummer mechanic will appreciate this.
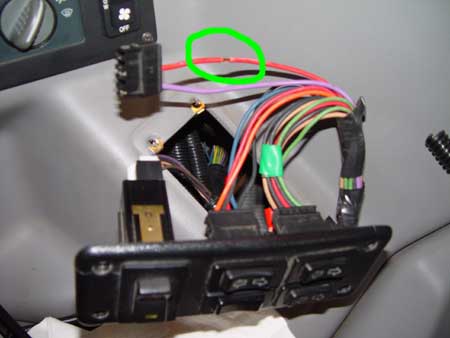 This is where I got the switched 12v. I take a single edge razor blade and carefully remove about 1/4" of insulation. I then tin it with solder and wrap the new wire around the bare area. I then solder the wires together. Then I take some liquid electrical tape (brush-on plastic) and paint the connection. When it's dry I wrap it with electrical tape.
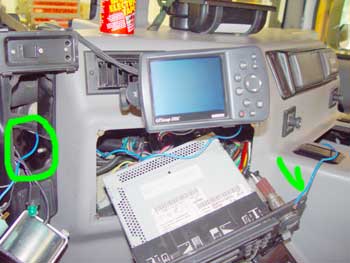 I ran a wire (blue) from the violet wire behind the tach cluster (clock) to the new gauge. Pulling the radio out made the job easy. Just remove 4 screws.
My Garmin 176c GPS is mounted above. See the article.
 When I installed the light I soldered a connector on one of the wires and slipped it around the ground screw on the gauge. I attached the other to the violet dash light power using a spade connector. I used tube 'A' with a green boot.
 Another option is to mount gauges on the dash in a cluster. Shown is a single Trans oil gauge from Westach featuring a setpoint alarm. The cluster case is also available from Westach in one, two and three gauge configurations.
The ICOM Ham transceiver is on the left.
