
Sound and Heat Insulating a
Diesel Hummer Part 1
©Copyright 2000 - 2007 Chuck Kopelson 12/14/2007
Updated February 10, 2008
 MAKE SURE THAT YOU DO NOT USE POWER TOOLS WHEN REMOVING THE PHILLIPS HEAD TRIM SCREWS. USE HAND TOOLS. IT WORKS BETTER. TRUST ME. Power tools on the trim screws tends to strip them out. My local dealer did not understand this and screwed up a bunch of panels and mounting points. I made them pay for their mistakes. They were very careless. Take your time.
Use the wooden roller to go over the damping materials, to make sure that the adhesive backed panels fully stick.
When working on the truck, I went in this order and moved clockwise...from left to right.
A. Rear Passenger Seat
B. Center of the truck - Back Wall Area
D. Rear Driver Seat
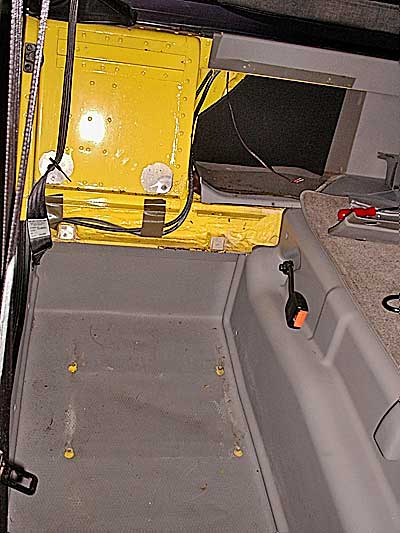
I started from the rear passenger side of the vehicle. Since this is an Open-Top, I started by pulling the rear seat out. You need a socket set to remove the 4 bolts. I think it is 9/16", but I cannot remember for sure. It is easy. Pull the 4 bolts and the seat comes out easy. Set the seat somewhere safe and cover it over so that you do not damage it. Starting south, start removing the behind the seat trim panels. This rear fenderwell area is a critical area and a lot of noise comes into the cabin from the tires.
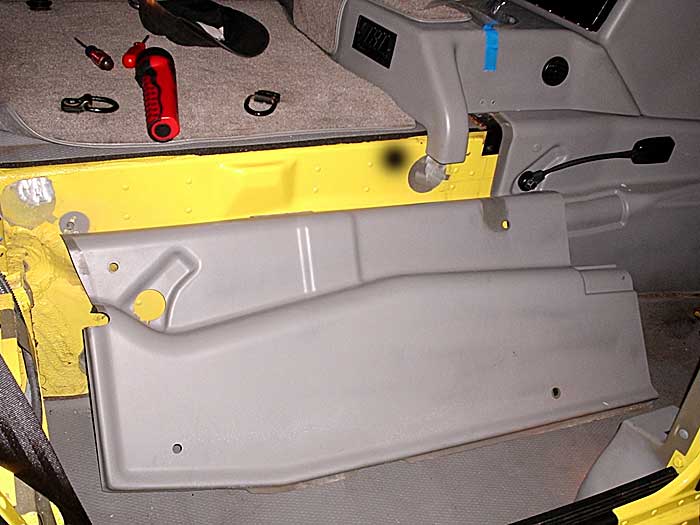
The trim panels are held in place by Philips head screws that obviously unscrew and then trim panel retainers that pop in and out of place. Once you pull the panels off, get your spray cleaner and degreaser and degrease the panels and remove all dirt, etc....you are officially prepping for sound insulation. The panels come out logically.
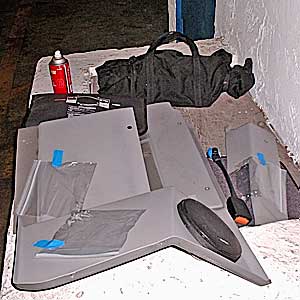
Take plastic Ziploc bags and use them to hold the screws and trim panel retainers. Then use masking tape to attach the screw bags to the panels. I am NOT A FAN of losing stuff. Keep organized and it will go together again much faster when you re-assemble. STAY ORGANIZED AND DON'T LOSE YOUR STUFF.
Now that you have the floor and the drive tunnel trim panels out of the truck, it is a good time to degrease everything. Spray everything down. Use a sponge. Make sure there is no sticky stuff, grease and dirt left. Windex also works well for this. I remember using a bunch of different chemicals and then going over everything with water and windex.
AM General applies a thick, asphalt based material to the floor of the H1. It is like a thick dynamat product that has a clear film on top of it, that is sticky. On top of this, applied to the vinyl floor, they have closed cell foam rubber padding that is about 1/2" thick.
THIS IS A CRITICAL DECISION TIME.
FLOOR TUTORIAL. You have TWO (2) different options here; the Street Queen Version and Off-Road Comfort Version.
Hummers leak. If you do any off roading where you ford a stream or splash through a puddle a little water will always come up through the floor at the drain plugs or come in through the lower door seals. When it rains many trucks leak at the lower corners of the windshield or through the hood release cable hole.
Off-Road Comfort Version:
If you want additional sound insulation and you are concerned about water entering your truck, you are going to keep the 1/2" thick factory rubber padding on the floor leaving the floor stock. You don't want to use any cotton shoddy material on or near the floor.
Street Queen Version:
If you want to have the best protection against sound and road noise, and your truck does not leak and you do not plan to use your truck in a situation where water is going to get into the truck, you will tear out the factory waterproof matting on the floor and replace it with vinyl damping sheets and the cotton shoddy material.
I did test and evaluate each version and I will give my opinions at the end.
Step 1: Only do this if you are going with the 'Street Queen' version.
Using a scraper and a flat head screwdriver, I removed all of the old asphalt mass-loaded damping pads that were on the floor of the truck. The asphalt based materials smell and have a bit of an odor to them. I never detected it in my truck, but it was evident when I was removing the floor. It will take degreaser and a sponge and a scraper to get all of the adhesive off. The asphalt material from AMG does not hold up well when it comes into contact with water. On my truck it was brittle and looked as if it was decomposing.
After you have a clean and bare metal floor surface, apply a layer of the vinyl based damping sheet to each of the recessed sections on the floor boards...do not apply damping material to the cross bars where the seats mount. I ended up using Cascade Audio VB2 as layer 1. You need to use your scissors and cut this material to fit. It comes adhesive backed. After you cut it to fit, remove the wax paper to expose the adhesive backing. Put it in place. Heat Gun It and Roll It into place.
Use the heat gun in conjunction with the wooden roller to smooth and flaten out the vinyl based damping material that will serve as layer 1.
Step 2:
I used the rubber floor padding as a template and traced the pattern onto the thick purple-coloured Maybach insulation material. I then traced a matching piece of approximately .090" rubber to go on top of the Maybach insulation material.
Giving credit where credit is due, I got the idea of using this layered approach from my Lamborghini LM002. The LM002 is eerily silent when driving and there is *no* road noise in the cabin. Lamborghini did spend some time on making these trucks quiet and I think the multi-layer approach works. The LM002 project manager in Italy explained to me that the rubber layer which is the uppermost layer before the carpet is used as a "sound barrier and an acoustic decoupler". You see this multi-layer approach on a lot of heavy farm and agricultural equipment, too. It will usually be closed cell foam and or rubber bonded to a heavy vinyl sheet. The vinyl on top is the barrier and helps isolate and control vibration. The rubber and or foam absorbs and decouples. Since Lamborghini started with tractors, they probably know a thing or two.
I then layered this "sandwich" into every recessed area on the floor of the truck and glued it in place using the Weldwood Contact Cement in a red can and I used a disposable paintbrush to slather it on. I then sealed everything with multiple layers of duct tape. Sealing with duct tape creates a barrier that countains the noise.
***You are going to need to do some test fitting with the interior panels to make sure that they will pop back into place and you will need to do some trimming on the borders of the insulation material, but it is no big deal.*** You just want everything to fit into place.
